Learn & Apply P5.JS, Perlin Noise, and Color Theory to Make Procedurally Generated Art in 15 Minutes

Hi! I’m Celia, and welcome to Learn/Apply installment numero dos. If this is your first time here, this series focuses on learning a cool concept fast and rapidly putting that concept to work, whether it be through art, code, or whatever medium tickles your fancy.
We’re going to be building off a few concepts from Learn/Apply #1, an Introduction to Color Theory, however that reading is by no means required. Every L/A issue stands by itself.
In this installment we’re going to be using javascript, specifically P5.JS and OpenProcessing, to learn a little bit about procedurally generating some animated art. An elementary understanding of programming is recommended, although I’m going to try and be as clear and beginner-friendly as possible.
What is color anyway?
Well, good question! It depends who you ask. However, the only person we’re concerned with asking today isn’t a person at all — its a computer. And the computer would probably say beep boop, color is a value from (0,0,0) to (255,255,255). This is the range of the RGB (red, green, blue) color model, with each value representing how much of red, green, or blue is represented in that hue. There are several other models, such as the CMYK color model and the HSV color model. For a more expanded understanding of color on the screen, especially how its used for procedural generation, check out this fantastic piece.
For our purposes, we are going to be focusing on the RGB model. Let’s take the color cyan as an example. Cyan’s RGB value is (0, 255, 255), meaning it is 0 parts red, and equal parts fully green and fully blue. So, theoretically, if you were to take out your paint brush right now, cyan would be the pigment you’d get by mixing together some green and blue paint.
Let’s make something already!
Now that we know about RGB values, let’s stop talking, and get right into the code. Open up a new sketch in OpenProcessing, and your code should look something like the snippet below.
function setup() {
 createCanvas(windowWidth, windowHeight);
 background(100);
}function draw() {
 ellipse(mouseX, mouseY, 20, 20);
}
This is some p5.js code at its most basic. Let’s review what it’s doing:
- It’s creating a canvas windowWidth long and windowHeight tall
- filling it with a gray background (the 100 corresponds to a grayscale value, with 0 being black and 255 being white. experiment with different variations on gray, or hand it an rgb value instead.)
- and drawing an ellipse, size 20, at wherever your mouse coordinates are.
Fun! You can test this by hitting the play button in the header, next to the code <> button. Use these two toggle between the two views, art and code.
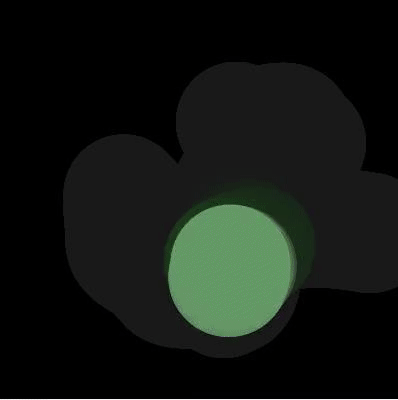
What if we wanted to make that circle cyan, instead of gray? How would we do it? Well, first, we need to know the function that fills our circle (or whatever polygon we choose) with a color. By consulting the p5.js reference page, we know that this function is called fill()! Let’s fill our circle with the value for cyan, [0,255,255].

function setup() {
 createCanvas(windowWidth, windowHeight);
 background(100);
}function draw() {
 fill(0,255,255);
 ellipse(mouseX, mouseY, 20, 20);
}
Isn’t that easy? Try experimenting with some other values to get different colors. If you please, you can also give it values from the different color models. I’m going to play around with color models and give our background the RGB value for cyan, and give our fill the grayscale value for gray.
function setup() {
 createCanvas(windowWidth, windowHeight);
 background(0,255,255);
}function draw() {
 fill(100);
 ellipse(mouseX, mouseY, 20, 20);
}
Perlin Noise, Briefly
Right now, the “animation” of our circles is restricted to way we move our mouse. But true animation moves autonomously, without input! So we’re going to make our circles do just that, using something called perlin noise.
Perlin noise, developed by Ken Perlin in 1983, is a type of “gradient noise.” Simply put, it is a random value that is intentionally not-so random. We can look at it through the analogy of throwing darts at a dartboard. If our throw is truly random, our darts will hit everywhere on the board, from the edges to the inner circle. But that level of randomness is often undesirable; sometimes we want randomness that restricts itself. So perlin noise is analogous to throwing darts at a dart board and always hitting somewhere within the first two rings.
The effect of perlin noise is that it makes procedurally generated movement, texture, or terrain look more organic and believable. Let’s try it out so you can see what I mean. The code below is borrowed from Gene Kogan’s wonderful write-up about perlin noise, which lists some great other examples you can try for yourself.
var t;

function setup() {
  createCanvas(400, 400);
  background(0);
  t = 0;
}

function draw() {
  // fade the background by giving it a low opacity
  background(0, 5);

  var x = width * noise(t);
  var y = height * noise(t+5);
  var r = 255 * noise(t+10);
  var g = 255 * noise(t+15);
  var b = 255 * noise(t+20);

  noStroke();
  fill(r, g, b);
  ellipse(x, y, 120, 120);

  t = t + 0.01;
}
What’s happening here? Let’s break it down…
- we create variables x, y to hold the randomly generated coordinates of our ellipse. these values are created by multiplying the width, height by the random value returned by noise(t)
- we declare r, g, b to hold our randomly generated red, green, and blue values. these values will be a random value in the range of (0,255). you’ll notice that the value we multiply noise(t) by is the upper bound on our range of values.
- we fill() our shape with those randomly generated r, g, b values.
- we increment the variable t. we must increment this value at every iteration because noise(t) will return the same value every time it is called. if we didn’t increment it, our circle would be a plain, gray, unmoving thing. the same logic goes for why each of our values has a different modifier (t+5, t+10), etc. if we used noise(t) for every variable, they would all have the same identical value.
Now let’s hit play and see what we’ve got…
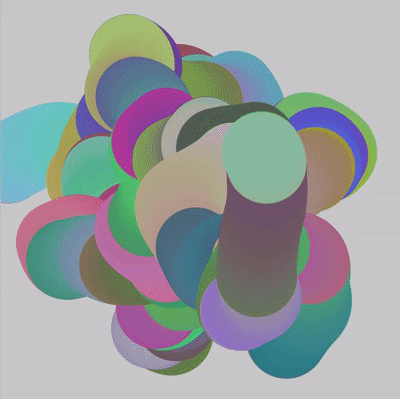
Pretty, right? Like a glow-in-the-dark worm, or something.
And there you have it! Your first piece of procedurally generated art! Imagine what you could do with a thousand of those worms worming around, or if those worms weren’t worms, but little dancing figures, or ants running around? Your only limit is your imagination!
+1 Challenge: Your Own Twist
Now it’s your turn. Try to make a variation on the code and spice things up a little. I took what I learned from L/A #1 on Color Theory and made my ellipse alternate between complimentary colors. Try it out for yourself or look at my code on my OpenProcessing sketch page.